Sunday, February 20, 2011

Works In Progress!


Strip Sashing Made Easy!

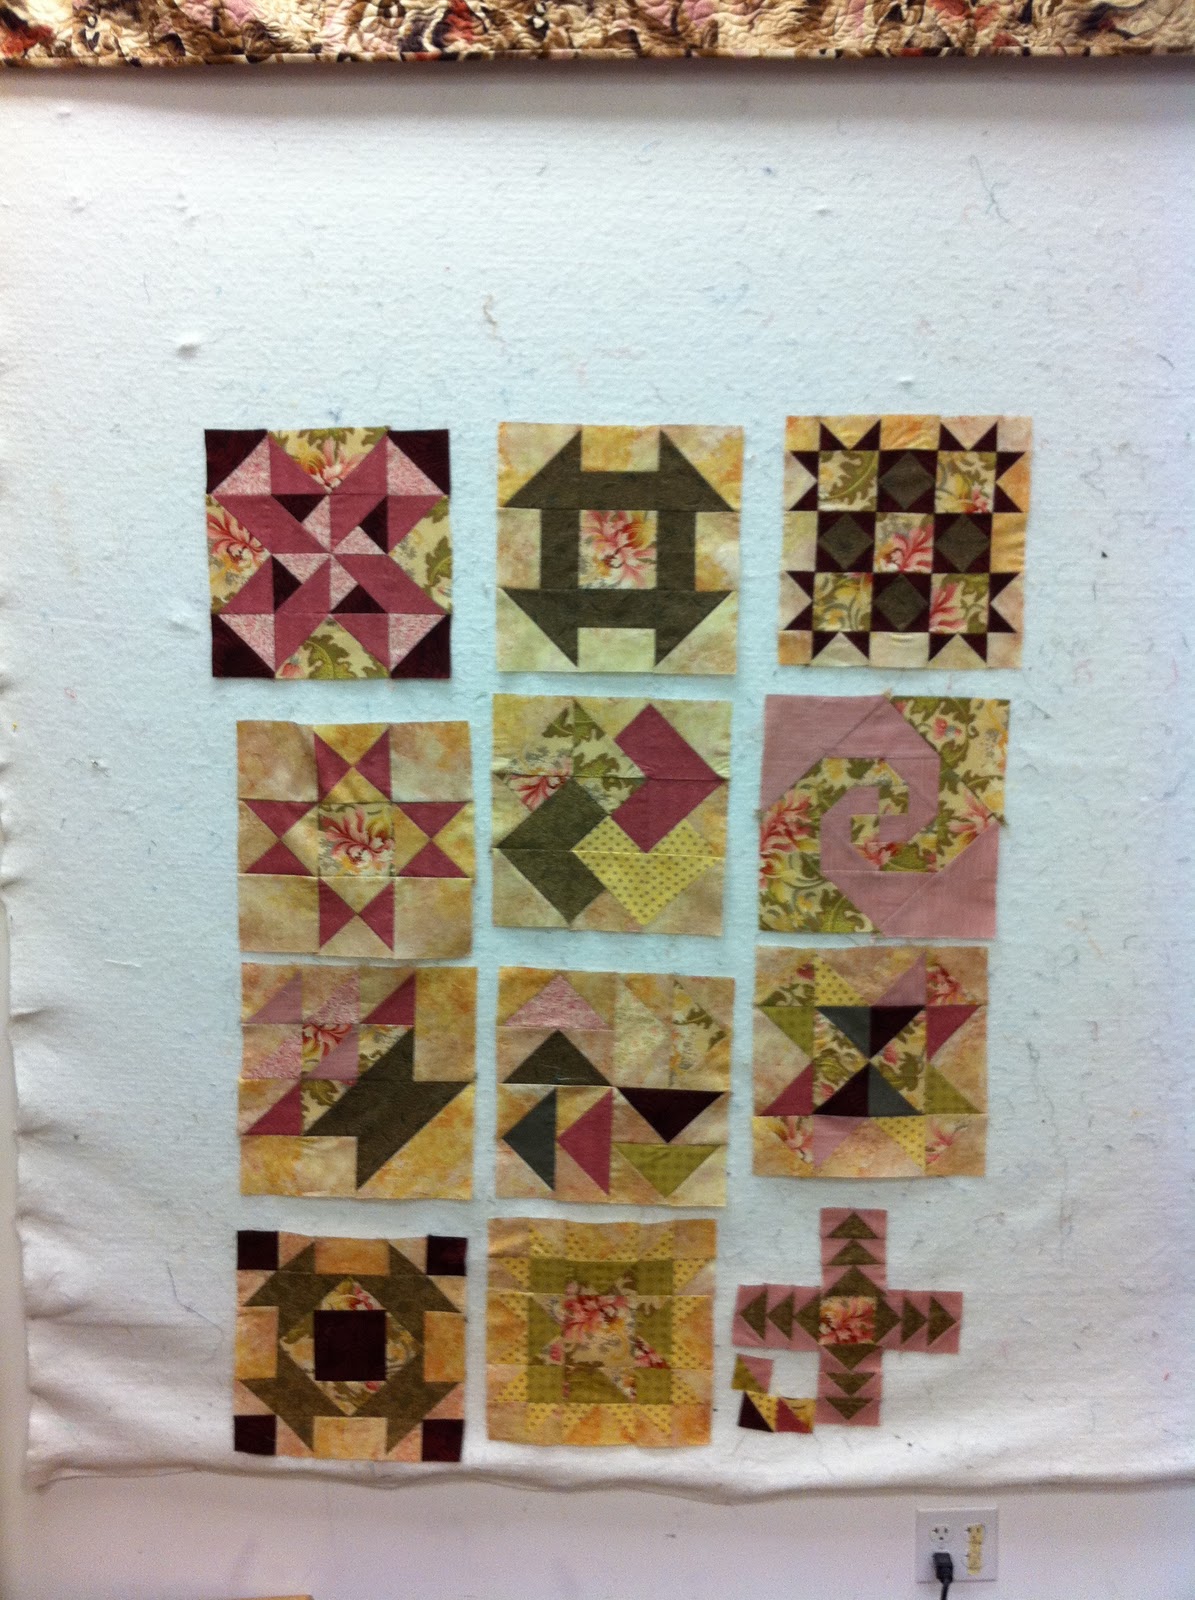
All 12 blocks are made, and it's time for the home stretch.  So let's start!  Our strip sashing is made with 2 fabrics, and in this lesson, we'll call them "Fabric 1" (orange) and "Fabric 2" (green).


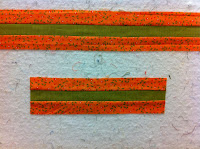
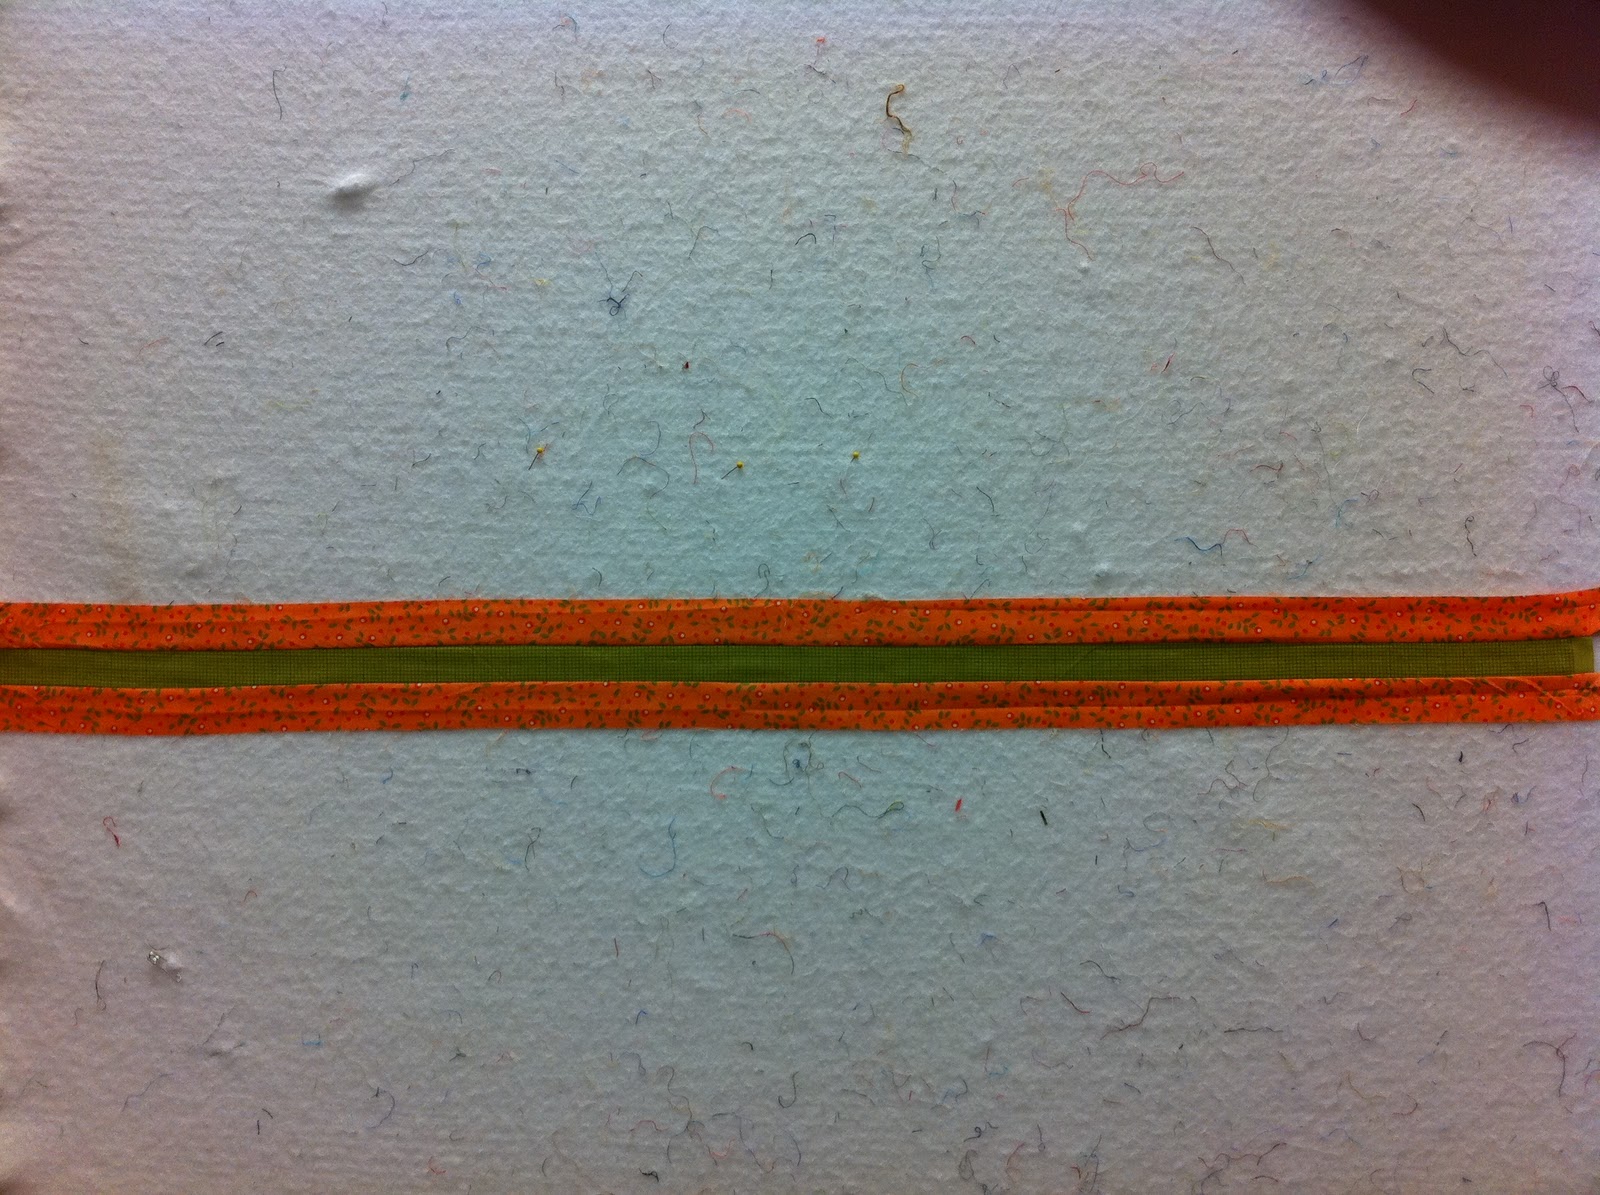
From Fabric 1, cut 22 strips 1-1/2" x the width of your fabric (WOF), which will be approximately 42"-44" or so. (Remember how to cut the WOF? Fold your fabric with the selvage edges together). From Fabric 2, cut 11 strips 1-1/2" x WOF. Now, using 2 strips of Fabric 1 and 1 strip of Fabric 2, construct 11 strip sets that look like this:
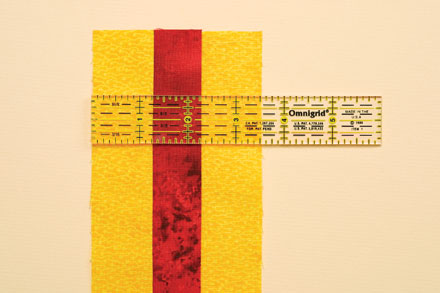
To make your first pieces of sashing, cut the strip sets you just made into 31 segments that are 12-1/2" long and set them aside.  SAVE the rest of your strip sets!


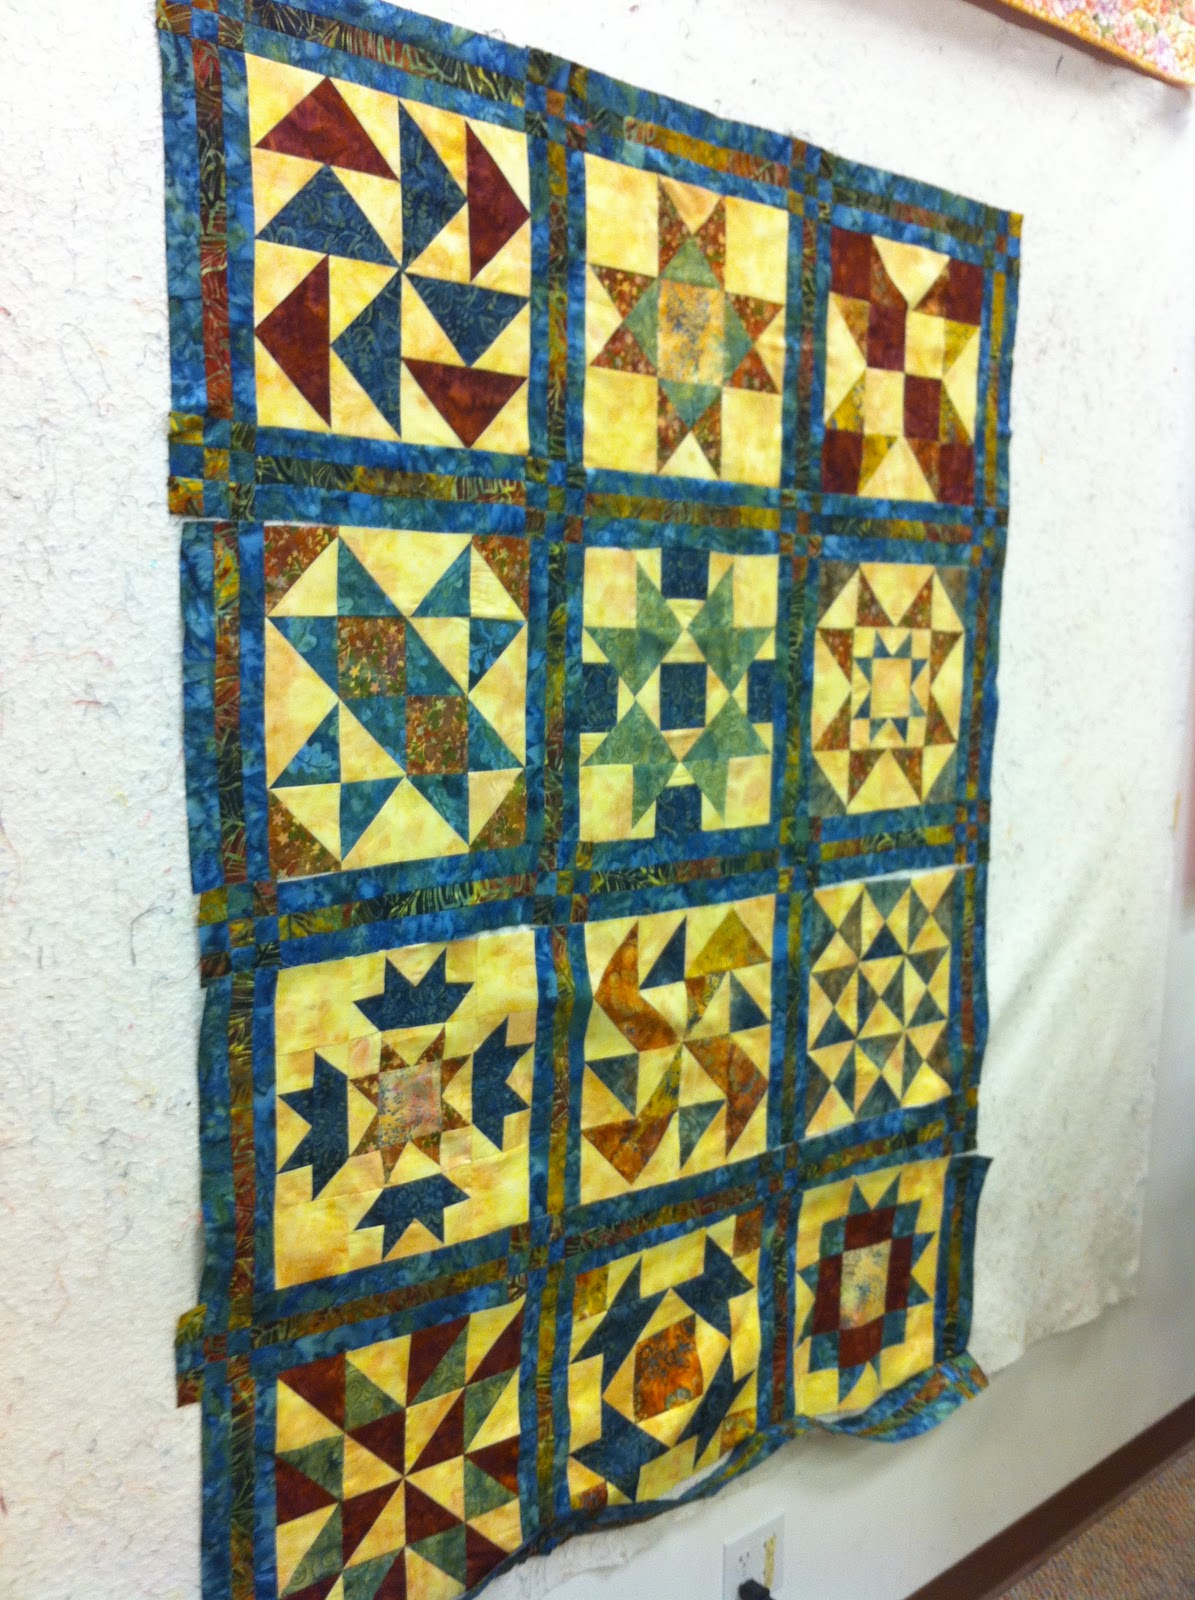
The easiest way to complete the next step is to lay your 12 quilt blocks out in the order in which you want them to appear in your finished quilt.  Now sew one of your 12-1/2" segments to the RIGHT side of each of your 12 blocks, leaving your blocks set out in order.  Now go back and sew a 12-1/2" segment to the LEFT side of each of the blocks in vertical row 1 of your layout, or the "left row" (confused? Go back and look at the pictures in the instructions I gave you in class).  Now join your blocks (and sashing strips) to make 4 horizontal rows.

Now lets make some 9-patch "cornerstones," the little squares that will go in between the sashing strips you made to make the long sashing in between your horizontal rows.  From Fabric 2, cut 4 strips 1-1/2" x WOF.  From Fabric 1, cut 2 strips 1-1/2" x WOF.  Using 2 strips of Fabric 2 and 1 strip of fabric 1, make 2 strip sets that look like this:

Cut these strip sets into 40 small 1-1/2" segments:

Remember the strip sets you saved earlier, the sets you made with 2 strips of Fabric 1 and 1 strip of Fabric 2? Using those strips, cut 20 small 1-1/2" segments:

Ready to make cornerstones? Using your small segments, create 20 cornerstones that look like this:

Now create 5 long sashing strips consisting of a cornerstone, a 12-1/2" sashing strip, a cornerstone, a 12-1/2" sashing strip, another cornerstone, another sashing strip, and finishing with a cornerstone.  These long sashing strips will go in between your horizontal rows and on the top and bottom of your quilt top and it will look like this:


Confused?? Post a message here or call!


Thursday, February 3, 2011

Class Three--Hard at Work!

This is what the class looks like from the teacher's table.  Scary, huh??


Miranda and Karen concentrating so hard!

Jill pressing her pieces into submission.

Pretty sure Bernice is trying to figure out how to steal Kay's green block.

The table with the prettiest cutting mats!

Friday, January 28, 2011

My favorite--Flying Geese! The Dutchman's Puzzle Block

Half Square Triangles, Quarter Square Triangles, and now the last basic pattern--Flying Geese!! To learn how to make flying geese, we are going to to the Dutchman's Puzzle block, which consists of 8 Flying Geese.

Let's begin!  First cut: 16 squares of your backgroung fabric 3-1/2" X 3-1/2"
                                  8 rectangles 3-1/2" X 6-1/2" from your accent fabric

The 8 rectangles that you cut will make the large triangles in the picture (blue and teal), so choose your fabrics according to how you want your block to look. You can use one fabric or as many as 8 different fabrics.

Start with one rectangle and two squares and, on the back of your 2 squares, draw a diagonal pencil line from corner to corner.  Align the square on top of your rectangle with right sides together as shown below.

Instead of sewing on either side of the line, as we have done in the past, we are going to sew on the line and fold the square back on itself, up and to the right.  BUT WAIT!!!  Instead of sewing DIRECTLY on the line, let's sew "one needle's width" to the right of the line (or in the direction that we are going to fold the square). Doing that will give you a perfectly pieced, more professional Flying Geese.  So sew your seam,  trim away the excess fabric, and press your piece as shown below.
 

Now we do exactly the same thing with the second square on the left side of the rectangle.  This time we will sew "one needle's width" to the left of the pencil line (or in the direction that we are going to fold the square after we sew it). Trim away your excess fabric, fold your square back, and press.


EASY, HUH???


Look how beautiful these Dutchman's Puzzle blocks are!


Thursday, January 27, 2011

Quick Piecing Quarter Square Triangles-- The Ohio Star Block

The second block that we are going to make for our Beginner Sampler is the Ohio Star.  In the following picture of an Ohio Star, the blue "star points" are quarter square triangles and, just like the half square triangles in the previous post, they can be quick pieced for a fast and easy block!

In order to quick piece quarter square triangles, we first have to make half square triangles, exactly like we did in the previous post.  You will start with two squares that are each 5-1/4" X 5-1/4".  One square will be your background fabric and one square will be one of your accent fabrics (whatever color you want your star to be). 

Referring to the previous post, make two half square triangles and press your seams toward the dark fabric.  On the back of one of the half square triangles, draw another pencil line, this time going in the opposite direction of your original pencil line (dissecting the first line). Now place your two half square triangles right sides together, with the light side of one half square triangle "kissing" the dark side of the other half square triangle and vice versa. Once again, sew a line 1/4" on each side of the pencil line.  When you have finished, cut on the pencil line, and you will have two completed quarter square triangles!

Now, how did we know to start with 5-1/4" squares?  Once again, we have to start by figuring out the "finished" size of our quarter square triangle. By looking at the picture of the Ohio Star above and knowing that it is a 12" finished block, we can figure that each of our quarter square triangles is 4" finished.  Instead of adding 7/8" like we did with the half square triangle, though, for the quarter square triangle we add 1-1/4".

Just remember, the math will ALWAYS be the same for every quarter square triangle: finished size plus 1-1/4".

Next-- the Flying Geese!

Quick Piecing Half Square Triangles

On the second night of class, we learned a cool and quick way to make half square triangles (the ones we used in the Churn Dash).  Let's recap.


The Half Square Triangle


In our exercise, we started with 2 squares of fabric that were 4-7/8" X 4-7/8".  In this example, our squares are again 4-7/8" X 4-7/8" and one square will be green and one purple.  On the BACK of the green square, we draw a diagonal line from corner to corner.  We then place the two squares together, with the right sides of the fabrics "kissing."  This is how it should look (the purple fabric is behind the green):
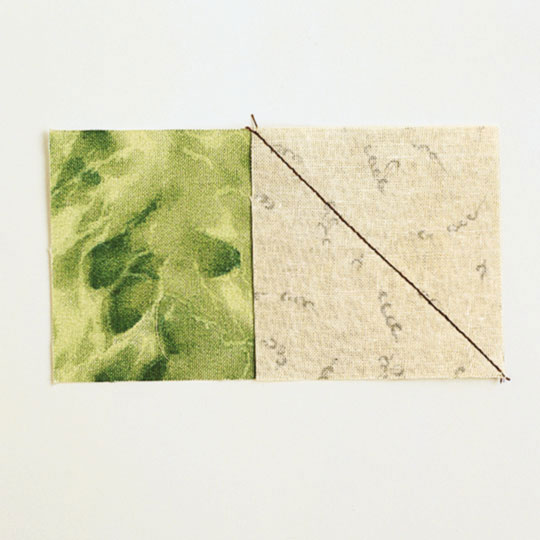
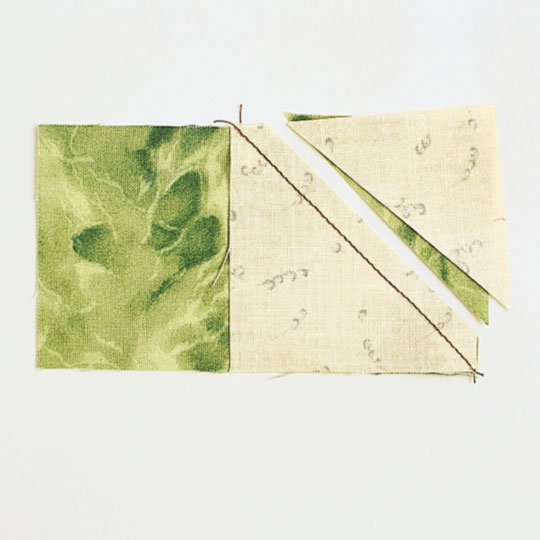
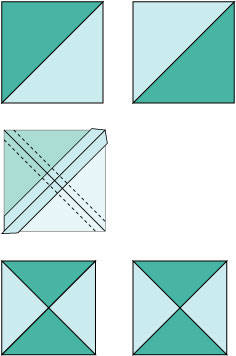
Now, using our quater inch feet, we sew  lines that are 1/4" away from EACH side of the drawn line.  When we finish sewing the lines, it will look like this:

Now all we have left to do is cut on the DRAWN line, and we will have 2 half square triangles that look like this:


So, how do we know what size to cut our squares to begin with?

By looking at the block you want to make, figure out the "finished" size of your half square triangle.  The "finished" size is the size that the half square trianlge will be when it is sewn into your quilt.  In our Churn Dash, the finished size of the entire block is 12", and the finished size of the half square triangle is 4".
                                                  ====this half square triangle is 4" finished

  Now add 7/8", and you now know to cut your starting squares 4-7/8" X 4-7/8".  The math will always be the same---add 7/8" to your finished size half square triangles in order to make them the quick and easy way!

Friday, January 21, 2011

The Quarter Inch Seam

At the end of class on Wednesday, we were discussing the quarter inch seam.  How do you get a quarter inch seam?  When you are using your quarter inch foot, the distance between your needle and the right edge of your foot is exactly 1/4 inch. So, when you are sewing two pieces of fabric together, if you will position the right edge of your fabric along the right edge of your foot, your seam will be 1/4" wide.  The picture above shows the proper way to position your fabric to get a 1/4" seam.

Here's a test for finding out whether your seam is 1/4".  Cut 3 strips of (scrap) fabric that are 5" long and
 1 1/2" wide.  Sew the first strip to the second, sewing along the length of the strip.  Now sew the first two strips to the third.  Press the seams to either side.  Now measure the sewn piece.  If it measures 3 1/2" across, you have great quarter inch seams!  If it does not, keep trying until you get a piece that measures 3 1/2" wide.  We'll be doing this test next Wednesday, but try it now too!